Card number two for today. Giving myself a speed challenge courtesy of As You See It (#289). Can I do it ten minutes or less? Let’s see…

I chose the sketch from Freshly Made (#564) and the colors from Color Throwdown (#721).


The trick for speed stamping is to be prepared and then set the timer.
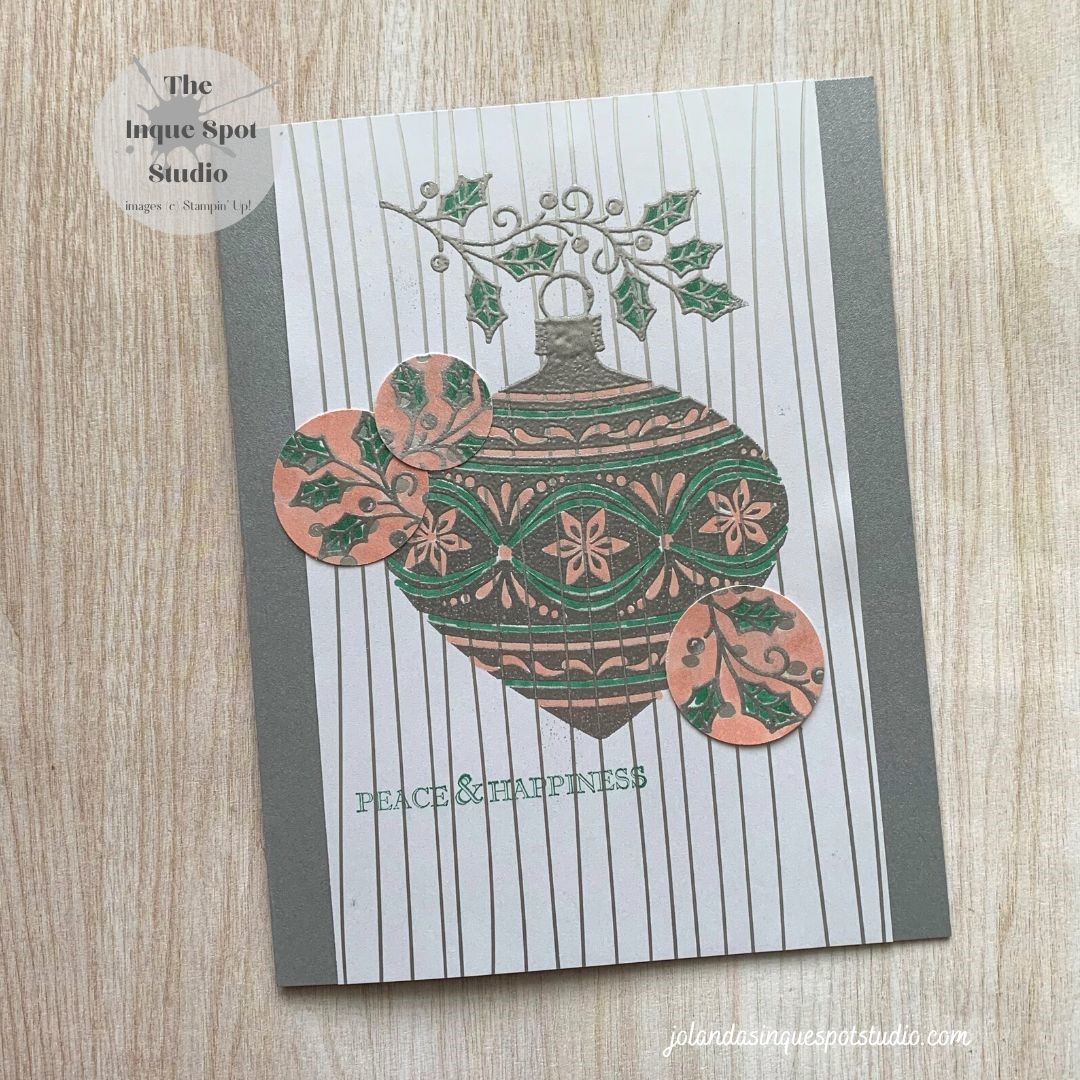
Here is the result:

Prep Work:
- Obtained scraps from the retired Sale-a-bration Silver & Gold Specialty Designer Series Paper pack. Sizes: (2½” x 3½”) Silver Dots and (3½” x 6”) Silver Stripes.
- Obtained my Brushed Silver cardstock base: (8½” x 5½”)
- Obtained stamp images, Ornament, Ornament Topper and Holly Branch from the retired Embellished Ornaments stamp set and the sentiment stamp, Peace & Happiness, from the retired Itty Bitty Christmas stamp set and added them to my blocks.
- Obtained my Stamp-a-ma-jig Positioning Tool.
- Obtained my retired (¾”) and (1”) Circle Punches.
- Selected my Light Calypso Coral and Dark Shaded Spruce Stampin’ Blends Markers.
- Ink Pads on hand and ready to use: Memento Tuxedo Black, Versamark and Shaded Spruce.
- Had my bucket of Silver Embossing Powder and spoon nearby.
- Had my Heat Tool plugged in and ready to go.
- Had the Simply Shammy Cleaning Sponge on the ready as well.
Steps:
- Card Base was scored at (4¼”).
- The Silver Dotted piece of patterned paper was colored with the Calypso Coral Stampin’ Blend Marker and set aside.
- Using Memento Tuxedo Black ink, the Ornament, Ornament Topper and Holly Branch were stamped onto the Plastic Sheet of the Stamp-a-ma-jig Positioning Tool, one in each corner.
- The stamps were cleaned.
- The images were then inked with Versamark and using the Stamp-a-ma-jig Positioning Tool as a guide, were stamped onto the Silver Striped patterned piece of paper.
- Silver Embossing Powder was spooned over the images, any excess powder was knocked off and then the images were heat-set with the Heat Tool.
- Additionally, two more Holly Branch images were stamped with Versamark and heat-set with Embossing Powder onto the Calypso Colored Silver Dotted patterned piece of paper.
- Letting the images cool for a quick second, I then colored the Ornament and the Holly Leaves with the Stampin’ Blends Markers.
- The sentiment was added under the Ornament.
- Using the Circle Punches, the Calypso Coral Holly Leaves were punched out.
- A quick look at the clock and I am still under the 10 minutes…
- The completed stamped image panel was trimmed to (5½”) and added to the card base.
- The Circles were added to the edges of the Ornament.
Done! And the time…9 minutes and 42 seconds.
This is such a pretty, shiny card. So happy that it turned out okay. Hope you like it!
Thanks for spending some more of your time with me today. Cheers, Jolanda.
Need a card? Ask me and I can create one for you. Want the supplies to create your own, let me know and I can help you with that too!
Like this card? Want to make one similar?
I would LOVE to be your Stampin’ Up! Demonstrator. If you live in the United States, you can order your paper crafting supplies from my on-line store. It is so easy. THANK YOU!
If you choose to shop with me today, please use HOSTESS CODE: C24QX6UH (December 2022) if you spend less than $150.00.
Check my website for the current promotions.

A real beauty, Jolanda, and I so enjoyed your play by play, lol. It sounded like me – I assemble everything to hand first, too! And so glad to hear I’m not the only one who still rocks her SAMJ! Thanks so much for playing at As You See It!
LikeLiked by 1 person
Fab card Jolanda, and very impressive to get so much done in less than 10 minutes! Thanks for joining us at As You See It
LikeLiked by 1 person
I’m impressed that you were able to use your Stampamajig in a timed Speed Stamping Challenge. That only proves that your organizational skills really allow you to do the impossible with a time limit! Such pretty colours on this one, Jolanda! Thanks for taking a risk with us at As You See It Challenges!
LikeLiked by 1 person
Lovely card, Jolanda. I enjoyed your step by step of the challenge. You’re right of course, that it comes down to good planning – which also included picking speedy techniques. I really like your colour choices. Thanks for joining us again at AYSI.
LikeLiked by 1 person
I love your pretty ornament! The shine of the embossing adds so much elegance. Thanks for joining us at Freshly Made Sketches this week!
LikeLiked by 1 person
Great combination of all the challenges! Thanks for joining us at the Color Throwdown this week!
LikeLiked by 1 person
I love the shine from all that festive silver Jolanda and the addition of the colouring really makes your ornament pop. Your super organisation was well suited to this challenge! Thanks for playing along with our speed challenge over at As You See It!
LikeLiked by 1 person