Another dark and rainy day…perfect time to catch up a few outstanding personal projects.
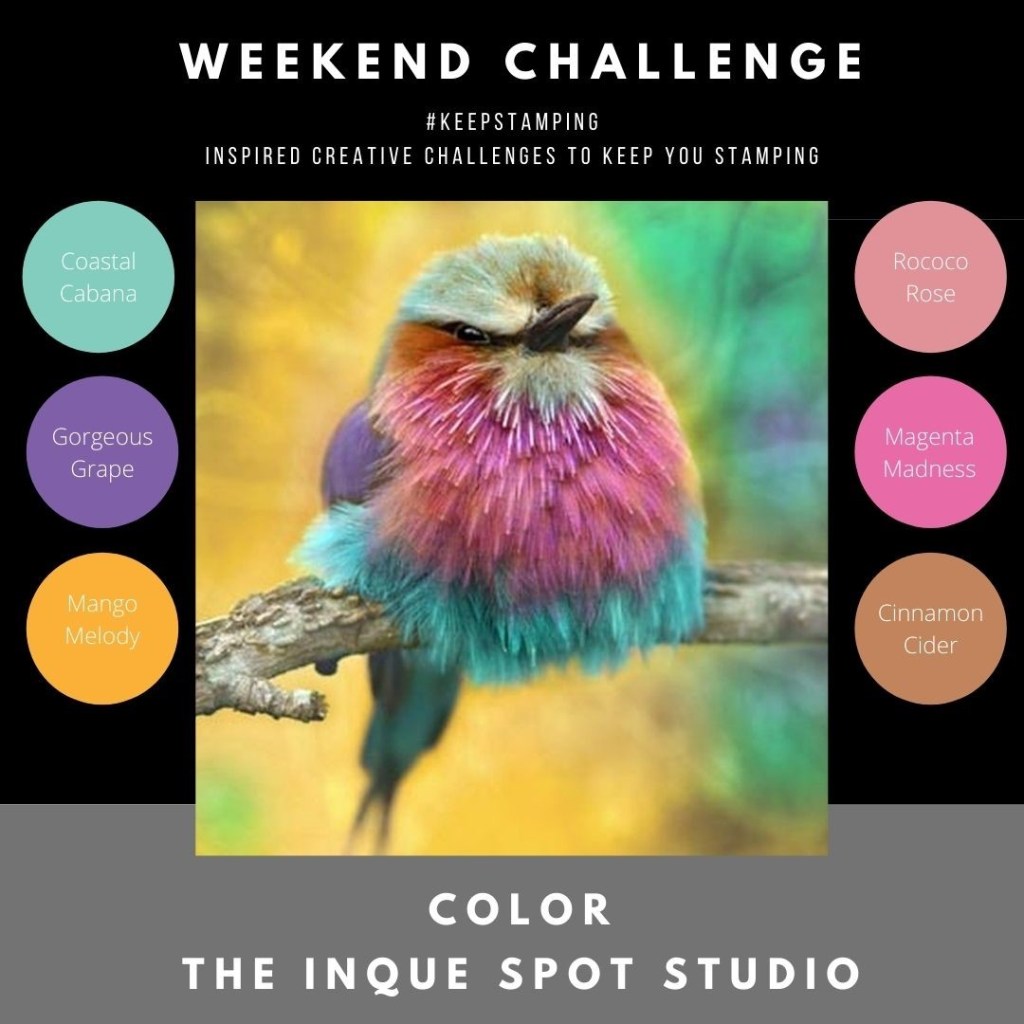


I so loved the Weekend Color Challenge when I chose it, back in January, for last week but got a little overwhelmed with how to use all the colors together. Last week’s Sketch was on my to do list but got pushed back as I worked on other projects. Eureka! Today’s Weekend Technique Challenge – Emboss Resist Backgrounds just made everything fall into place. I combined all three personal challenges into the card I have created.

Technique – Emboss Resist: This is a great technique. So many possibilities.
- Using Versamark ink, stamp the chosen image onto the cardstock and heat set with Embossing Powder.
- Using an applicator tool, add ink(s) over the stamped image.
- The embossed image will resist the color. Wipe clean with a soft cloth (paper towel) to shine and buff.
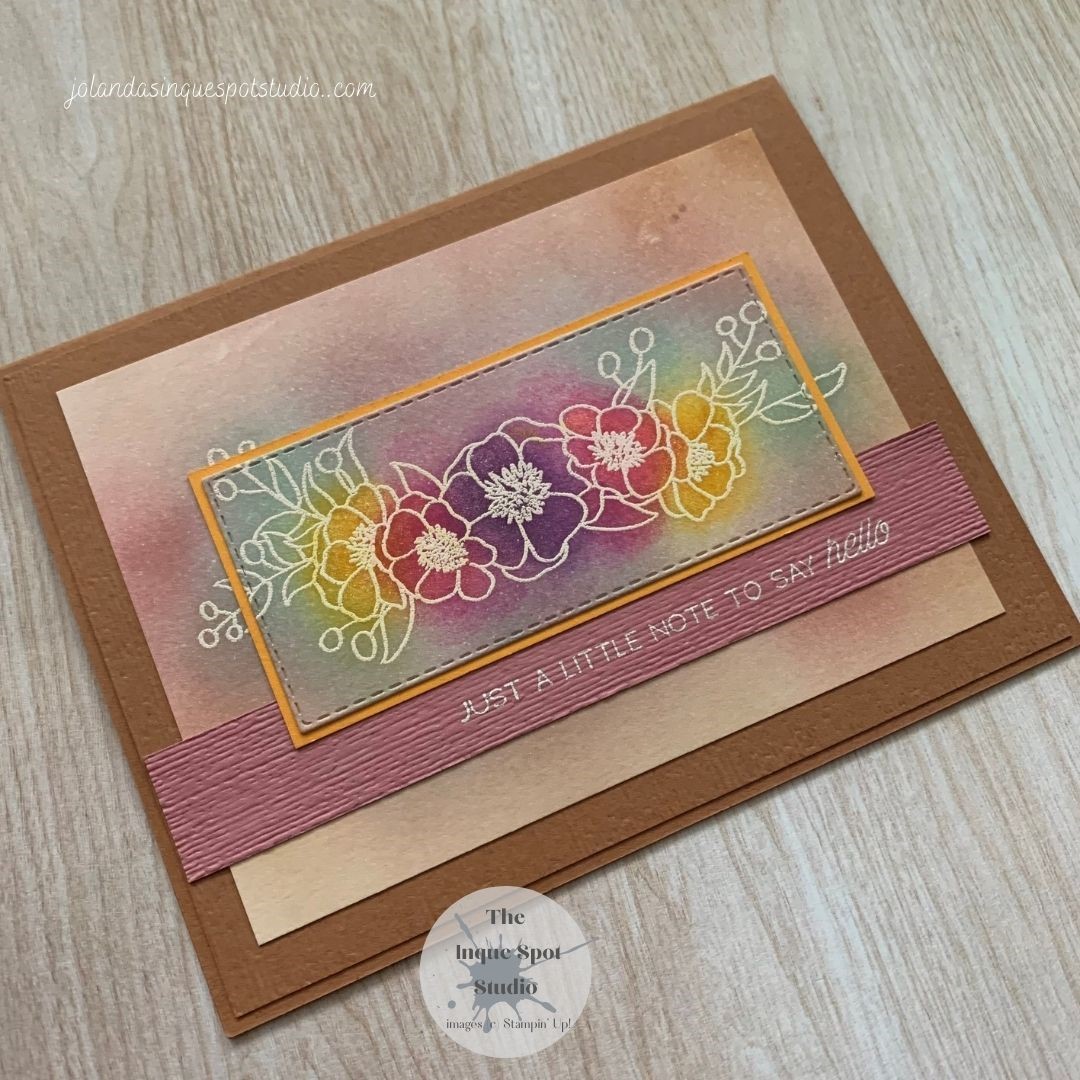
I chose a floral image from the Bloom and Grow stamp set. Stamped it onto Shimmery White cardstock and heat set with White Embossing Powder.
With Sponge Daubers, I applied Gorgeous Grape to the center flower, Magenta Madness to the adjacent flowers and Mango Melody to the outer flowers. The leaves were sponged with Coastal Cabana.
To complete the panel (3½” x 4¼”), I used Blending Brushes to apply more Coastal Cabana around the leaves and then Rococo Rose around the stamped image and then Cinnamon Cider around the edges. The image was polished clean. I like how soft and muted the background became and allows the focal point image to pop.
Technique – Multiple Layering: The stamped image(s) cut out multiple times and stacked with framing mats.
- Depending on the size of the stamped image, nested dies are used to cut the image from the background panel.
- Each nested piece is framed by a mat a little bigger than the next opening.
- Each framed piece is layered in a stack keeping the image connected.
- Often this is done in triples or doubles.
I chose to Double Layer. Using the Stitched Rectangle Die (1⅝” x 3⅝”), I cut out the floral image and framed it with a Mango Melody cardstock mat (1¾ x 3¾”). The framed image is layered back onto the panel at time of assembly matching the outlines of the stamped image creating my focal point.
To complete the card, I chose both a card base (4¼” x 5½”) and a background panel (4⅛” x 5⅜”) in Cinnamon Cider. The cardstock panel was dry embossed with the Subtle 3D Embossing Folder to add a little texture.
The sentiment, Just a Little Note to say Hello, from the A Little Lace stamp set was stamped in Versamark and also heat set with White Embossing Powder onto a Rococo Rose cardstock strip (¾” x 5¼”). I also added texture with the same embossing folder but changed the direction of the pattern. I chose to drop the cross strip so that the Double Layer stamping effect was not lost underneath it. It was also the perfect place for the sentiment.
Hard to see…but I used the Wink of Stella Glimmer Brush to add sparkle to the five flowers in the floral spray of the focal image. A nice little touch. So pretty!
I am very happy with this card. Waiting for all the ideas to come together takes a little patience but it is often well worth it!
Take me up on the Challenge(s), Choose one, two, or all three! Share what you made with me!
Cheers, Jolanda! Thanks for spending some of your time with me today.
Need a card? Ask me and I can create one for you. Want the supplies to create your own, let me know and I can help you with that too!
Like this card? Want to make one?
I would LOVE to be your Stampin’ Up! Demonstrator. If you live in the United States you can order your paper crafting supplies from my on-line store. It is so easy. THANK YOU!
If you choose to shop with me today, please use HOSTESS CODE: 34KGB2MM (February 2021) if you spend less than $150.00.
