Welcome back! Wow! I have been invited to be a guest designer by the Colour INKspiration Team for Challenge (#138). This is a favorite challenge of mine and I am so happy to participate..
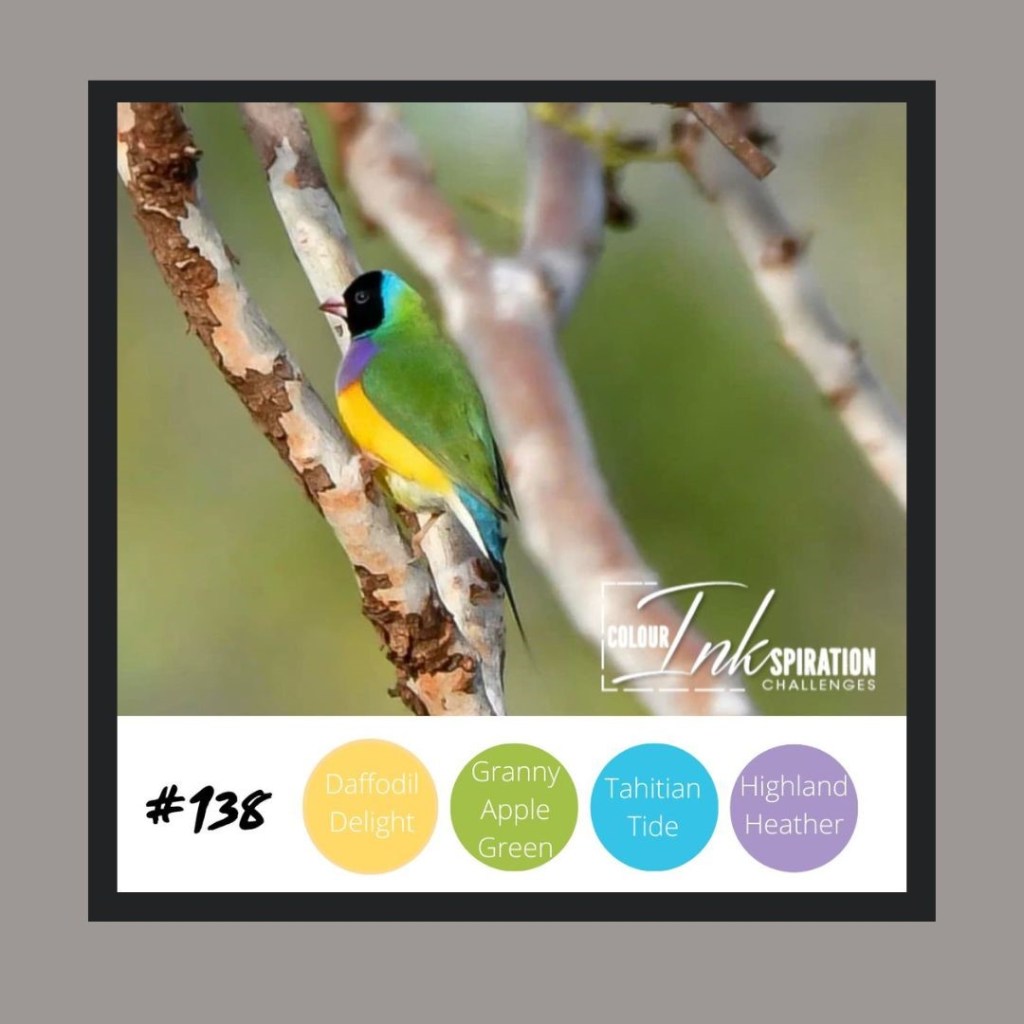
Are the colors not gorgeous? So bright! It was hard to decide what to make.
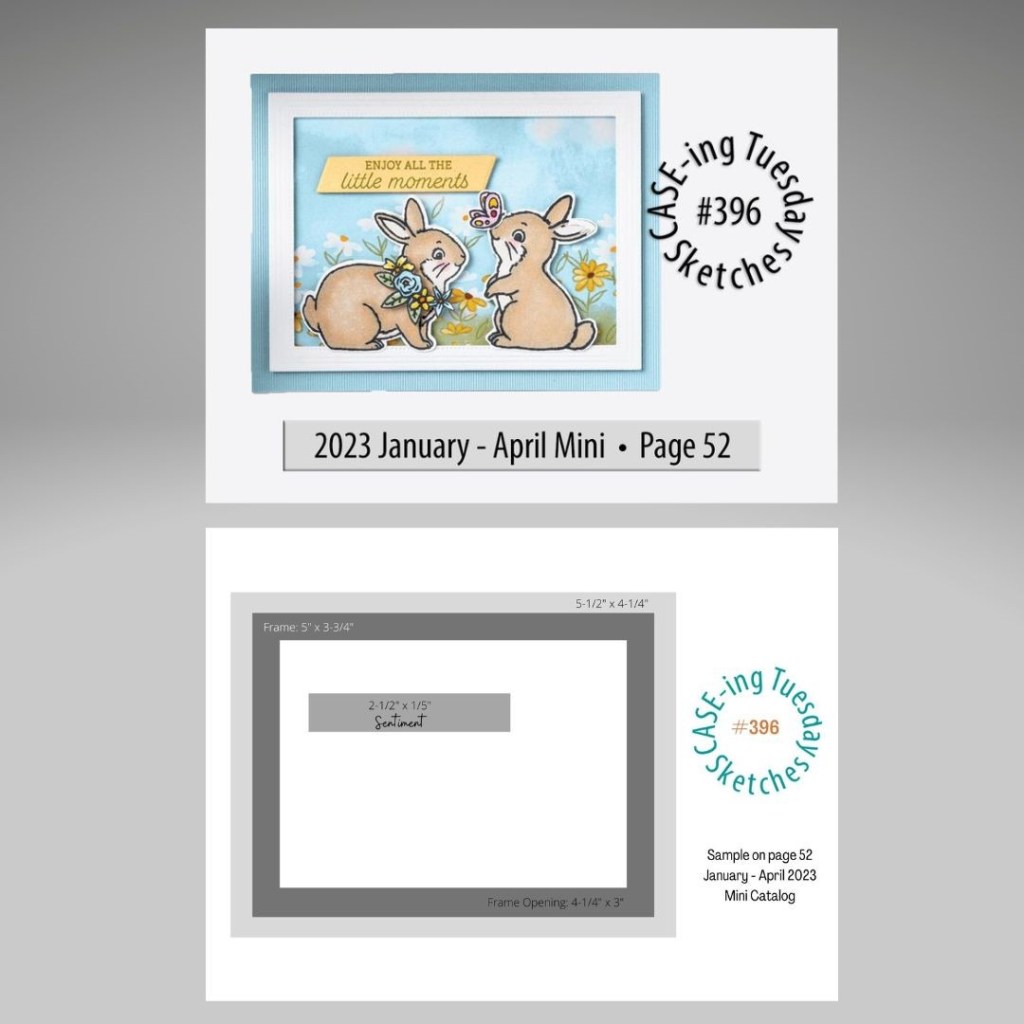
Additional challenges that informed my decisions: Inkspirational (#238) for the Tools and the Facebook Case-ing the Catalog Tuesday (#396) selection on page 52 of the January – April Mini Catalog for the Sketch.

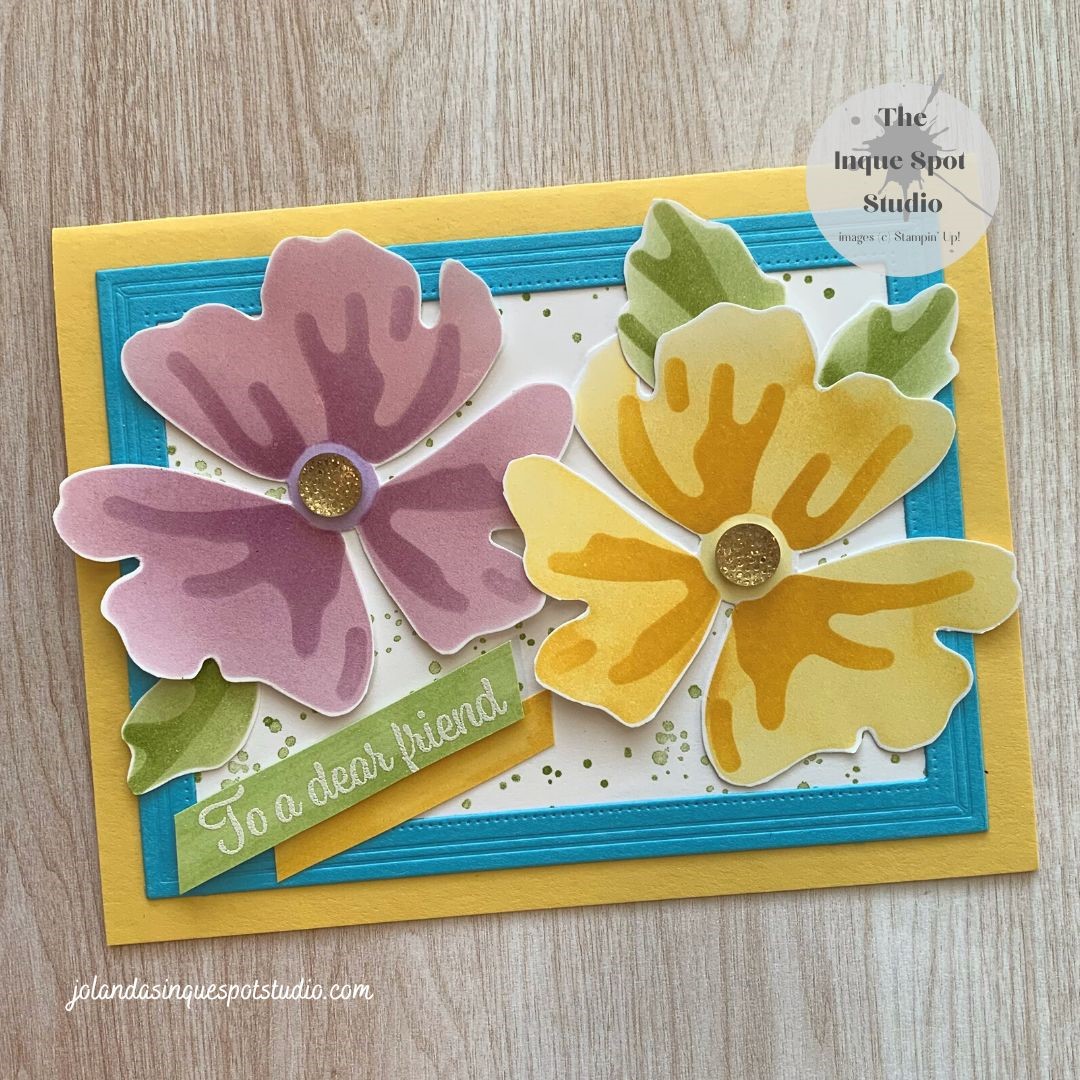
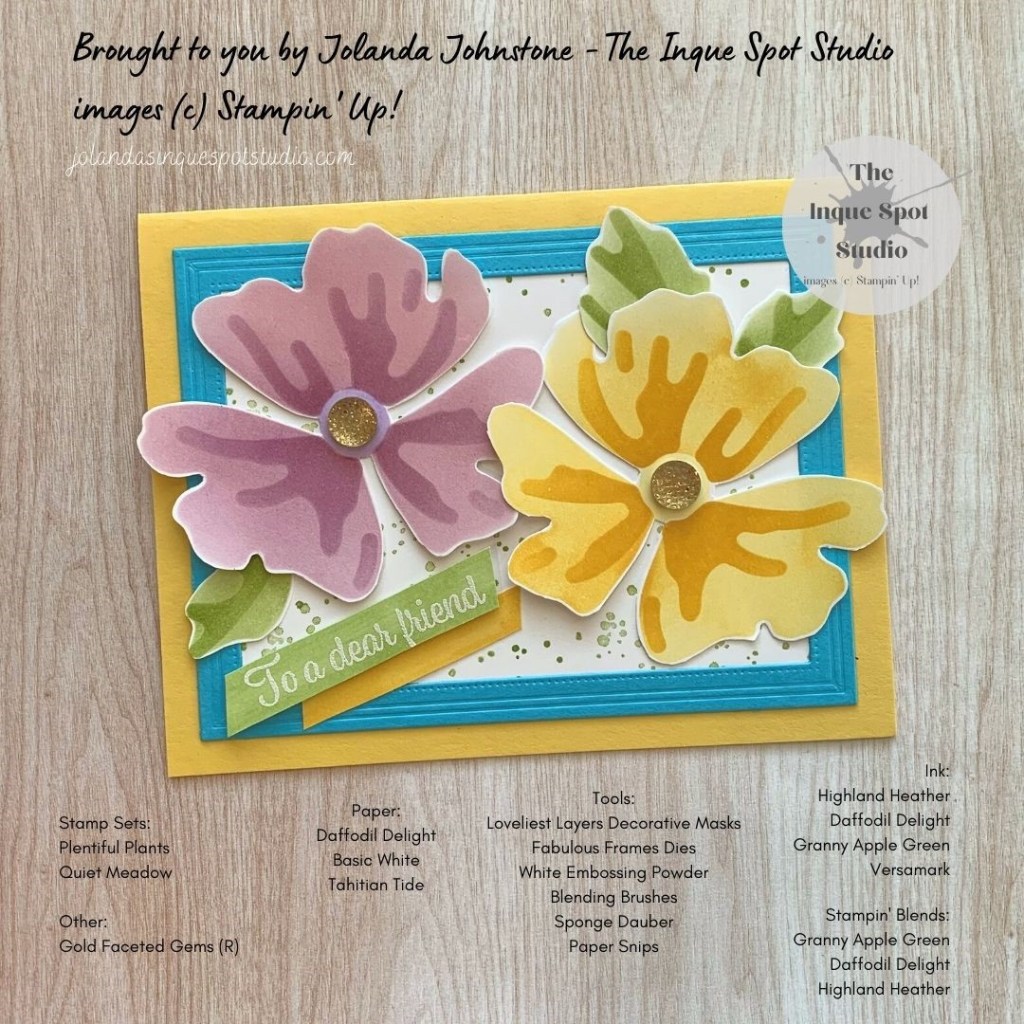
Here is the result:
Steps:
- Case Base: (8½” x 5½” scored at 4¼”) Daffodil Delight cardstock.
- Frame: (5” x 3¾”) Tahitian Tide cardstock die-cut with the Rectangle Frame from the Fabulous Frames Dies set.
- Background Panel: (4⅞” x 3⅝”) Basic White cardstock stamped with the Large Splatter stamp from the Quiet Moments stamp set using Granny Apple Green ink.
- Shapes – Flowers: Basic White cardstock.
- Using Highland Heather and Daffodil Delight inks and the Two-Step Floral Stencils from the Loveliest Layers Decorative Masks set along with Blending Brushes, the Flowers were made.
- The Floral Centers were colored in with the Light Highland Heather and Daffodil Delight Stampin’ Blends Markers to tone down the bright white.
- The Flowers were then fussy-cut with Paper Snips.
- Accent – Leaves: Basic White cardstock, Stencils, Sponge Dauber and Granny Apple Green ink.
- The Leaves were created in the same manner as the Flowers and then fussy-cut.
- Sentiment Banner and Accent Banner: Basic White cardstock scraps.
- The cardstock was colored with the Light Granny Apple Green and the Dark Daffodil Delight Stampin’ Blends Markers.
- The sentiment, To a Dear Friend, from the Plentiful Plants stamp set was stamped with Versamark ink and heat-set with White Embossing Powder.
- The Banners were trimmed with Paper Snips.
All elements were adhered to the card base to resemble the sketch. The Sentiment was popped up with Dimensionals and retired Gold Faceted Gems were added to the centers of the Flowers.
Layering the Stencils and using the same ink color creates a nice tone-on-tone effect for an all-occasion card.
Hope you give the challenges a try…l am looking forward to seeing what you will create.
Thanks for spending some of your time with me today. Cheers, Jolanda!
Need a card? Ask me and I can create one for you. Want the supplies to create your own, let me know and I can help you with that too!
Like this card? Want to make one similar?
I would LOVE to be your Stampin’ Up! Demonstrator. If you live in the United States, you can order your paper crafting supplies from my on-line store. It is so easy. THANK YOU!
If you choose to shop with me today, please use HOSTESS CODE: Z4TJUVEE (February 2023) if you spend less than $150.00. One week left of Sale-a-bration…make sure you place your order.

Fabulous card Jolanda! Many congrats on the GD spot – thoroughly deserved!
LikeLiked by 1 person
Thank you, Deborah.
LikeLiked by 1 person
I love the colors and gorgeous flowers wets and hcolors w they give your card a summery r tropical feel. So beautiful. Thanks for joining our challenge at Inkspirational.
LikeLiked by 1 person