September 25th, 2020
This week the theme for Simple Stamping is Nature. I chose this theme because the calendar of days indicates that tomorrow, September 26th is Hunting & Fishing Day. Not too many men in my life that hunt and fish but Stampin’ Up! has some great stamp sets that fall into that category. If you have any of them, surprise me with your creation!
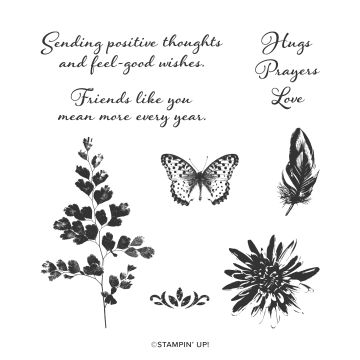
For me, I am back at the tent observing nature…and the Positive Thoughts stamp set felt like the perfect one to use.

My challenge to myself was to use one stamp set, three colors and one neutral, and an easy technique. My color palette: Blushing Bride, Pear Pizzazz, Sahara Sand and Whisper White. The technique: Masking and Sponging with Generational Stamping. The stamp set: Positive Thoughts.
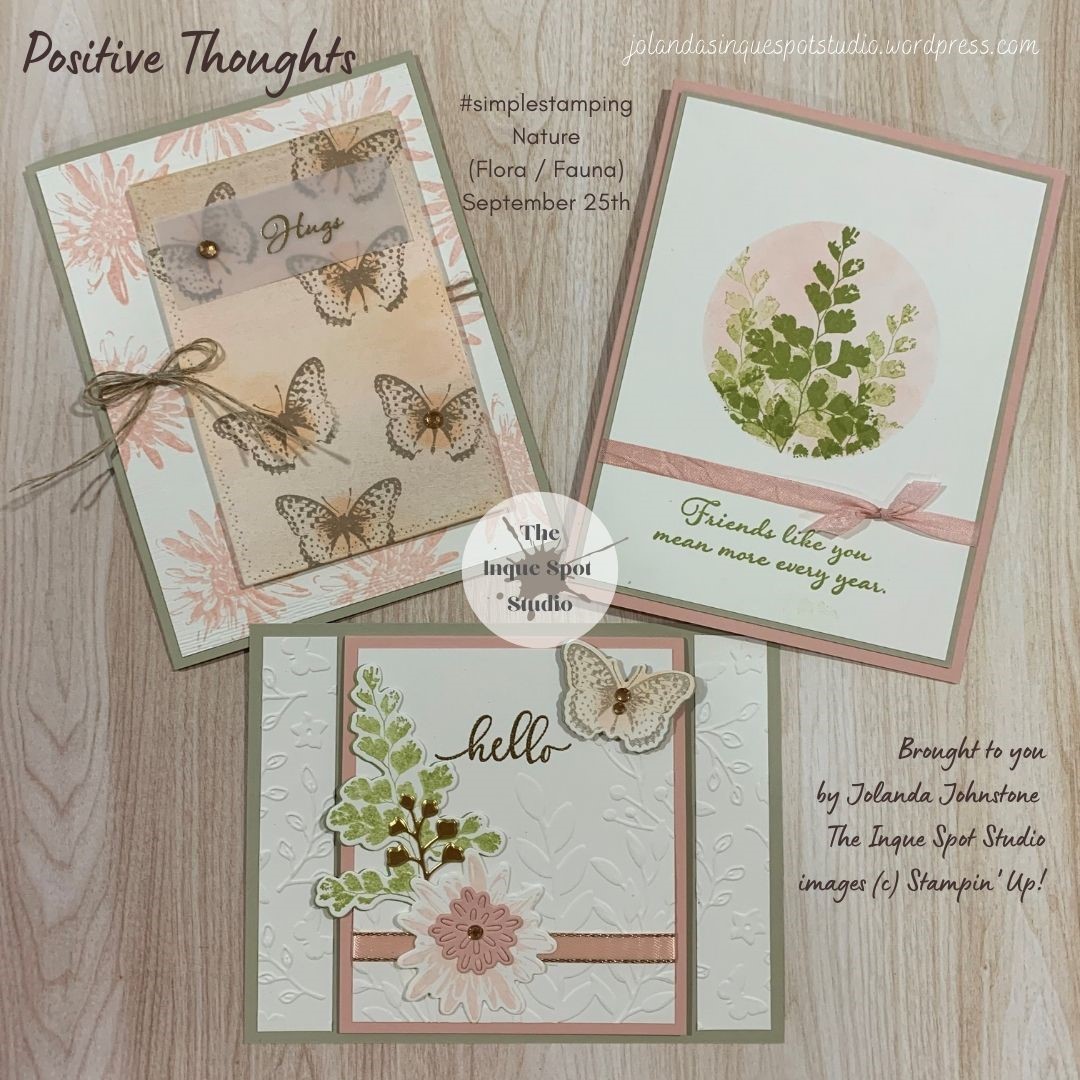
Easy – Friends Like You
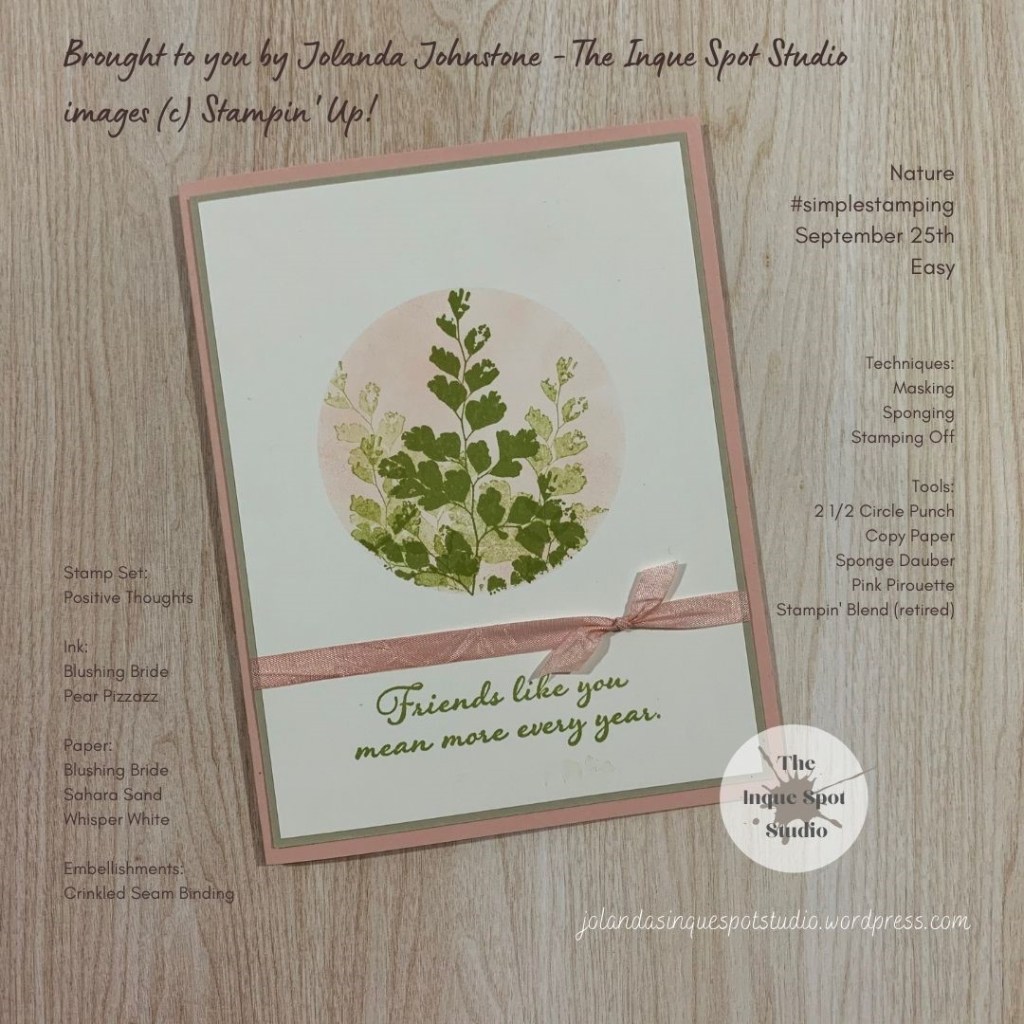
A mask is pretty easy to make. Here, I used copy paper and a circle punch. If you do not have a circle punch, create an open square with Post-it Notes. With a sponge or sponge dauber, add ink to fill in your open window. Apply the ink lightly at first, then create depth with a little more color here and there. Once you are happy with the color application, stamp your chosen image once in full strength, then again and once more to get three shades of the color. Generational Stamping (Stamping Off) is a great technique because you create a soft shadow effect while filling in the space with more than one ‘color’.
Complete your card with a sentiment. I chose a simple bling element by adding a ribbon. I colored the Crinkled White Seam Binding Ribbon with a matching color Stampin’ Blend (Pink Pirouette – retired). There are many ways to color your neutral ribbons. I generally use one of the Stampin’ Blends because the alcohol base dries so quickly.
- Method 1) Drag your ribbon through your Ink Pad. Add a little water with a paint brush if it is too dark or patchy looking, blending the color.
- Method 2) If you have Stampin’ Write Markers, you can color the ribbon directly and add a bit of water to blend.
- Method 3) If you have Stampin’ Ink Refills, you can create a little bath of color by mixing with water. Add drops until you achieve your desired depth of color and soak. Let ribbon dry or use a heat tool to speed up the drying process.
Step Up – Hugs
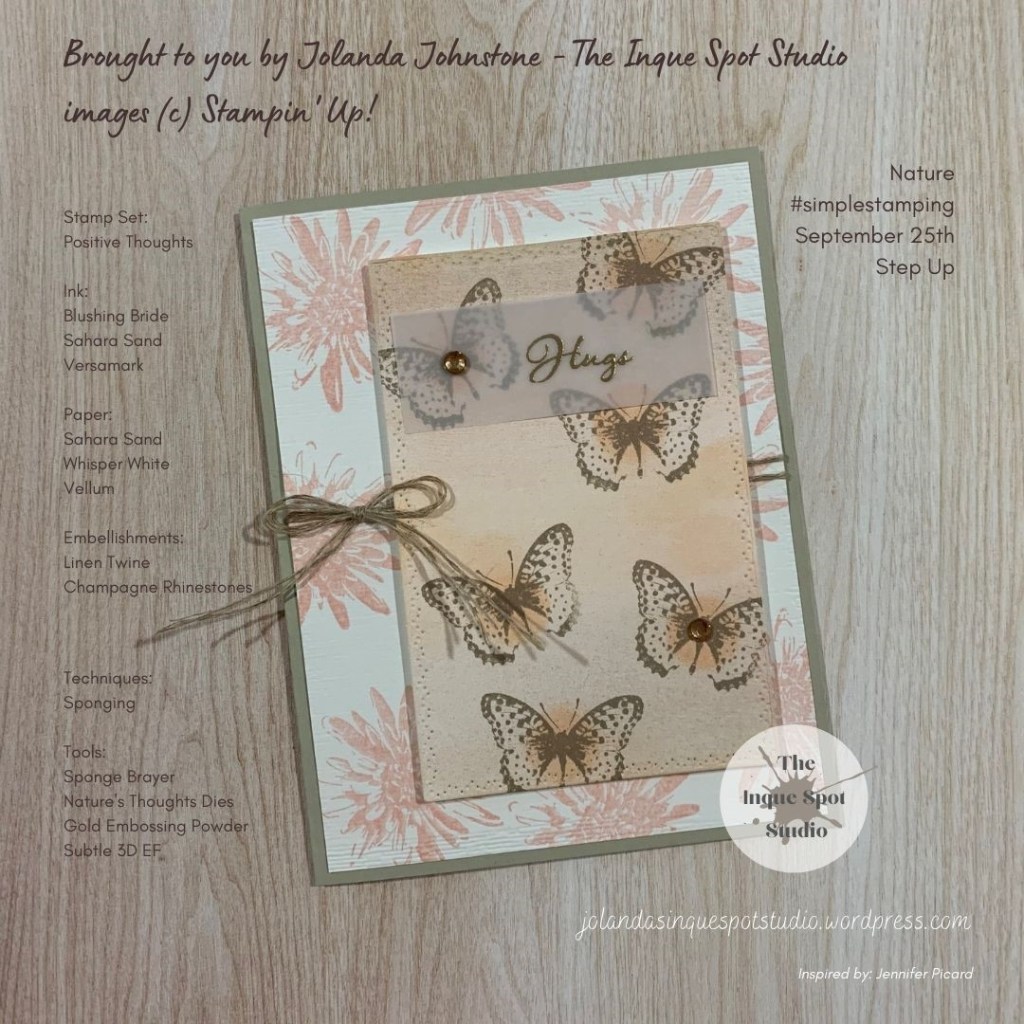
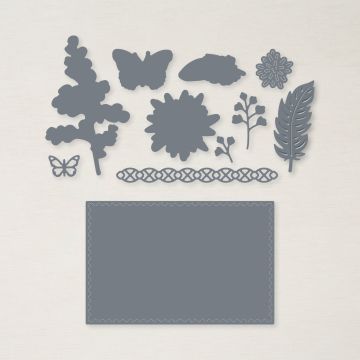
To step up this card, I added layers, dimension and used the coordinating Nature’s Thoughts Dies, the Subtle 3D embossing folder and a bit of Vellum and Heat embossing.
Not a difficult card, but you will need to use an Embossing & Cutting machine when using dies and embossing folders. I love how texture and interest can be added to cards when using these products.
With a Sponge Brayer, I added Blushing Bride to center of a Whisper White piece of cardstock and Sahara Sand to the top and bottom…a nice little ombre effect. The butterflies were randomly stamped with Sahara Sand. The floral element was randomly stamped with Blushing Bride on the Whisper White panel. The butterfly panel was die-cut and the floral panel was embossed. Note: If you do not have and Embossing & Cutting machine, these two panels could be straight cut rectangles and the card would be just as pretty.
Only the word “Hugs” was used for the sentiment. I carefully inked this word in Versamark, stamped on to the Vellum label, added Gold embossing powder and heat set it. It is so neat to watch the powder melt as it is heated creating the raised effect for your images.
Putting it all together, I added a Linen Twine bow and a few Champagne Rhinestones. This card was inspired by one I saw on Pinterest created by Jennifer Picard. I thought her card was really pretty.
Stepped Up – Hello

This is a Fancy Fold card and uses a lot of texture. The Sahara Sand card base is flat (4¼” x 5 ½”), the center Blushing Bride panel is the ‘card’ (3½” x 8”, scored @ 4”) and opens up.
Each stamped element was die-cut. I also cut shadow pieces in coordinating colors. As you can see, the Pear Pizzazz behind the fern, the Sahara Sand behind the butterfly, the Blushing Bride blossom center for the floral image. Bringing in the Sponging technique, the center of the butterfly has been daubed with Blushing Bride. The center Whisper White panel and the side panels were dry embossed. The Greenery EF on the center panel and the Meadow Moments EF the side panels.
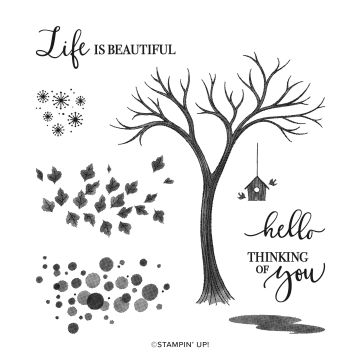
As I was arranging all of the elements on the center panel, I determined that I had only a little room to gold emboss my sentiment. I did not want to use “Hugs” again (but I could have), so I went looking for a small sentiment in my ‘stash’. I settled on “Hello” from the Life is Beautiful stamp set. Such a lovely font.
Additional bling…gold foil die-cut elements…a bit of fern and a little butterfly (inside of card) and Metallic Edged Ribbon colored with the Pink Pirouette Stampin’ Blend and a few more Champagne Rhinestones.
I really like this series of cards. Do you? Have a favorite? Let me know and tell me why.
If I have inspired you to create, post the card(s) you make using the theme “Nature” on my Facebook Post: https://www.facebook.com/theinquespotstudio so we can all see your creativity.
Need a card? Ask me and I can create one for you. Want the supplies to create your own, let me know and I can help you with that too!
Like these cards? Want to make it?
I would LOVE to be your Stampin’ Up! Demonstrator. If you live in the United States you can order your paper crafting supplies from my on-line store. It is so easy. THANK YOU!
Principle Products Supply List: If the link does not take you to my store: Add me as your Demonstrator: Jolanda Johnstone in the look up feature.